Hardware Setup-
» Connect your oscilloscope to the DDSOP SMA connector and connect your spectrum analyzer to the DDSON SMA connector.
» Set your clock to the desired frequency with 3 dBm power. Connect your clock to the DDSCK SMA connector.
» Plug the 12V power adapter into the power jack.
» Connect the DSM board to your PC with the USB cable.
» Schematically, the connections should look something like the diagram below:
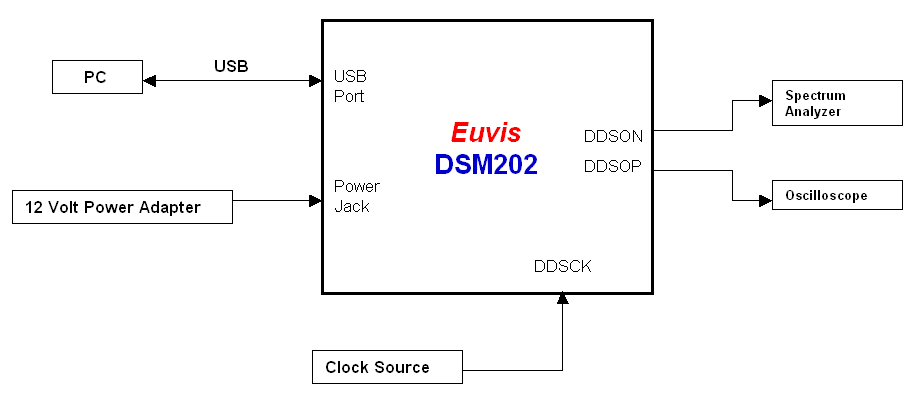
» If you have done everything correctly, you should see the built-in waveform output on your
oscilloscope and your spectrum analyzer.
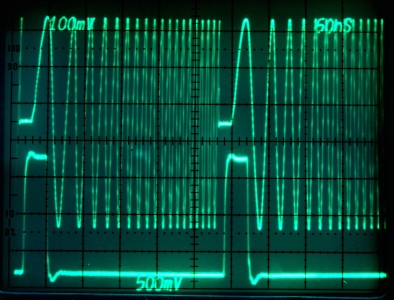
The built-in linear chirping waveform is pre-stored in the firmware and is automatically loaded at startup.
The built-in chirping waveform is a linear chirping waveform sweeping from 7.8 MHz to 125 GHz with frequency update
at 32 clock cycles per update. The image below shows the startup waveform as seen from an oscilloscope.
|